SUPPLIES:
- Olive Oil = 21.2 Ounces
- Palm Oil = 10.6 Ounces
- Coconut Oil= 10.6 Ounces
- Rice Bran Oil = 4.77 Ounces
- Shea Butter = 3.18 Ounces
- Castor Oil = 2.65 Ounces
- Lavender 40/42 Essential Oil = 75 Grams
- Colloidal Oatmeal powder= 4 tablespoons
- Oat Milk = 20 ounces
- Lye = 7.29 ounces (206 grams)
- Gloves
- 2 Thermometers
- A pot for melting the oils
- A bucket for cooling and mixing the lye and distilled water
- A stick blender
- A soap mold
- Parchment paper
- A Digital Scale
- A measuring cup
- A coffee grinder
- 5 lb wooden soap mold
- Dried Lavender Buds for decoration
- A large towel to wrap the mold in
- A knife for cutting the soap
DIRECTIONS:
1) Wear gloves and measure
out your distilled water oat milk in the bucket you intend on making your
lye mixture in. You can blend oats and make your own if you don't have oat milk on hand- its 1 cup oats, 3 cups distilled water and blend- if you do this strain out the oat particals with a cheese cloth before using it). Now measure the lye and add it to the distilled
water oat milk. Do this near a
window, it gets stinky! Place the thermometer into the solution and wait
for it to cool to about room temperature.
2) Measure your Olive Oil,
Coconut Oil, Palm Oil, Castor Oil, Shea Butter and Rice Bran Oil in grams or ounces with your digital scale and a add it to the pot you have for melting the oils. Place this pot
over low heat until all of the oils melt together. Once they are melted
place your second thermometer inside this pot and set it aside to wait for it
to cool to room temperature also. You can place both the pot of oils and the bucket of lye mixture in an ice bath if you'd like to speed up the process
3) Now measure out your Lavender Oil and set it aside for later use. You are also going to want to take your
whole oats (NOT INSTANT!!) and grind them up on the coffee grinder to make
almost an oat powder and set that aside also, this is the Colloidal Oatmeal powder.
4) Now take your soap mold
and line it with parchment paper. Set it aside also.
5) When your oils and lye
mixture have cooled you want to combine them slowly while stirring. When
they are a smooth and even texture add the powdered oats and the lavender oil. Now mix the batch with the stick blender until it is the constancy of
thick yogurt. This is called reaching trace. You will be able to
tell you are at trace by dribbling a little of the soap mixture on
top of the batch and seeing if it settles on top or
is immediately absorbed into the liquid. If it settles on top
you have reached trace.
6) Pour your soap mixture
into the mold, sprinkle some lavender buds on top, cover it, wrap it in a towel and let it sit overnight.
7) The next day (AT LEAST
24 HOURS LATER!) Remove the lid and towel and cut your soap into
16 even bars. Place on a cooling rack in
a well ventilated area to cure for 6 - 8 weeks, flipping each
week.
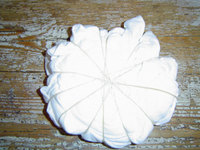
TA DA! You're done! 16 home-made bars of soap!
.jpeg)

.jpeg)