Sunday, February 26, 2012

'Create' Wall Art

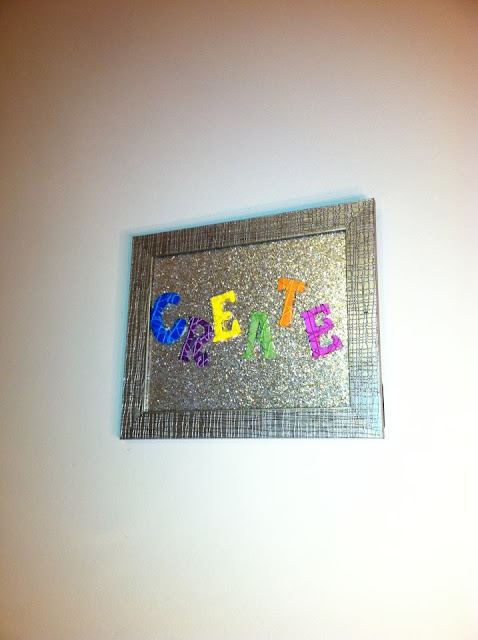
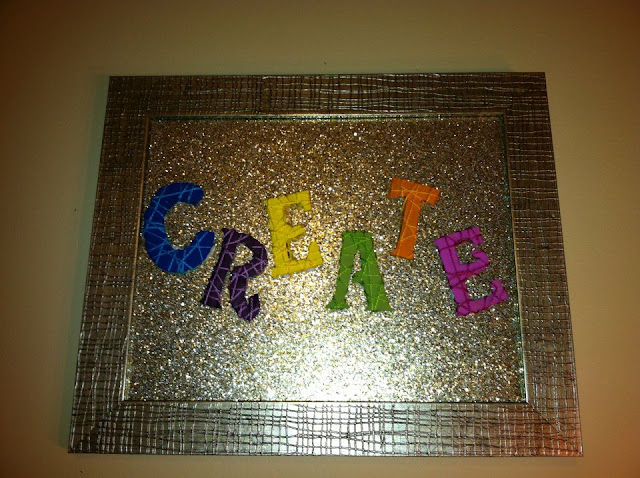
Once I put the melted crayon art on my wall I realized how empty the wall of my craft room were. So I decided to make something else for the wall above my craft table. I wanted it to relate to crafting and to motivate me or remind me why I have that room in the first place. After thinking about it i came to the conclusion and this piece of wall art should just say CREATE. It is after all the name of my blog, what I love to do and it defines the purpose of that room!

Here is my how to for my 'Create' wall art piece...

SUPPLIES:
  • 5 Different Colors of Acrylic Paint
  • 5 Correlating Colors of String/Yarn
  • Glue
  • Cardboard
  • Scissors
  • Scrapbook Paper
  • A Picture Frame
  • A Paint Brush
  • A Pencil
DIRECTIONS:

1) Take the piece of cardboard and the pencil, draw bubble letters in the font that you would like your word to be in. I wrote Create and did it in curly-ish font.

2) Cut the letters out!

3) Paint each letter in a different color with your acrylic paint. Let them dry. (Here is a link about acrylic paint, it's so versatile and one of my favorite things to work with... About Acrylic Paints)

4) When your letters are dry wrap them in the yarn/string in a scattered spaced out way. Similar to how you wrap your headphones around your iPod.

5) Fit the scrapbook paper to the frame and frame it. I removed the glass pane from the frame because I wanted 3D letters.

6) Glue the letters to the frames piece of scrapbook paper.

YOU'RE DONE!

here is mine...


What do you think? What word would/will you do?!
Wednesday, February 22, 2012

Melted Crayon Art

I am addicted to StumbleUpon and Pinterest and if you are as well you will understand why I had to make this next project.  It's EVERYWHERE! I kept seeing so many different versions of this project on different sites I just had to make one.  Here is the How-To...  I may be adding to it later in a Part Two post if I get motivated. I have another idea!...


SUPPLIES:

  • A Box of Crayons
  • A Hair Dryer
  • A Canvas
  • A Hot Glue Gun
  • Glue Sticks
  • A Ruler


DIRECTIONS:

1) Choose the colors you would like to use for the project and arrange them as you would like.  I chose a standard rainbow arrangement because I think its pretty. 

2) Take the crayons you chose and arrange them along the top of your canvas in the pattern or order you would like.  Like this... (I used a ruler to make sure they were straight.)

3) Now glue each individual crayon down onto the canvas with your glue gun.

4) This is the fun part! Plug in your hair dryer (I would not recommend using the one you use daily unless you don't mind cleaning it off after the project, the melted crayons splatter!) Ok, hold the hair dryer about an inch from the top left end of the crayon in the corner.  You have to hold it here for awhile until the crayon starts to melt and run, then you can use your hair dryer to push the melted wax wherever you'd like it to be on the canvas.  You can melt all of them as much or as little as you like,  I melted mine alot because it was so fun! 

5) Let it dry, you're done!

Here are some other ideas from Crayola for melted crayon projects!...


Oh, and here is how mine turned out...


I really like it! It's colorful and fun and I have it hanging in my craft room :)

Are you going to make one? What color scheme are you going to use? You could even put it upside down! What do you think?


Tuesday, February 21, 2012

Bathroom Wall Art

Our bathroom was kinda bland and I wanted to do something fun and different with our wall decor. Most people have photos of toothbrushes or soap or like butterflies for some reason but I wanted something unusual. And I didn't want to spend a lot of money.


I came up with this idea because I saw a photo of someone who had framed a bunch of Hermes and CHANEL bags over a vanity. I loved it but I didn't have those types of high fashion bags from purchases just laying around. I had one Coach bag (from my wristlet) and one CHANEL bag (from my sunglasses) which clearly wouldn't have been enough... then I thought well.. I receive ELLE Magazine and that is full of high fashion!


I started going though the magazine and finding AWESOME ads that were glamorous and beautiful. They were ads that I knew if I had gorgeous supermodels in my bathroom I would be more motivated to be a little more glamorous every day. So here is where the project began...


SUPPLIES:

  • Magazines (I chose ELLE)
  • Scissors or X-Acto Knife
  • Picture Frames
  • White Paint
  • Picture Hangers
  • A Hammer
  • Nails
  • Ruler


DIRECTIONS:


1) Take the magazine and find the images you want to frame. You are going to have to compare them to the size of your frame. I chose four 8x10s, two 4x6s and one 3x5 of all different designs and colors. I bought them as Marc's and Walmart for around $2-$5 each. Once I had a stack of images that fit and I liked I cut them out with my X-Acto knife and set them aside.


2) This set was necessary because I had purchased frames that were not all the same color SO I had to lay each one out and paint them white. I chose Krylon Dual with paint and primer to knock two steps out at once. I spray painted each frame so they matched... See Below


3) Then I took my picture hangers, measured the center of the back of the frames and hammered them in.

4) Next add the ads that you want! I chose 6 different ones - A Gucci, a Marc Jacobs, a Valentino, a Dolce & Gabbana, a Bottega Veneta and a CHANEL. I also frames the Coach bag I had for the small wall next to the sink.

5) Now arrange them and hammer the nails in the wall in the spot you desire to hang them from!

Here is how mine turned out!


I LOVE THEM!!! And I get A LOT of compliments! Fun, easy and cheap! My boyfriend doesn't mind either because they're hot supermodels, Haha!

What would you frame? Supermodels? Cars? Art?

Thursday, February 16, 2012

Silhouette ‘Birds in a Tree’ Wall Art Part 2

So earlier this week we covered Part One of the Silhouette ‘Birds in a Tree’ Wall Art project. Now I am going to cover Part Two!

SUPPLIES:
  • 2 Canvases
  • A Pencil
  • A Paint Brush
  • A Bottle of Black Acrylic Paint
  • Pictures of Birds
  • X-Acto Knife

DIRECTIONS:

1) Find photos of birds sitting in a tree. You can find the photos on the internet and print them out or do what I did which was buy a bird book (Half Price Books again) and cut the images out that way. The birds need to be the size and shape that you want on your canvas because these will be the stencil for the silhouettes on your tree branches. They also need to be photos of perched birds, not ones in flight. I found a few I liked in a book. Now, cut them out with the X-Acto Knife very carefully and along the outer edges of the whole bird and set them aside.

2) Take your canvas and free hand branches of a tree. Be sure to incorporate branches from one canvas to the next. Make it as compact or thin branch-wise that you'd like.

Here is what mine looked like...

3) Grab the cut out bird stencils you made and place as many as you want on any branch and trace them with your pencil.

4) Paint! Now it is time to fill in your outlines with solid black paint! Mine required two coats.


You're done!! Here is how mine turned out!...


I love it! and I have even had a few requests from friends to make them for their apartments or houses! Easy and fun! Hope you enjoyed the project too!

Did you use as many birds or tree limbs? What did/would you do different?

Silhouette ‘Birds in a Tree’ Wall Art Part 1

I wanted some new wall art for our living room so I decided to do some research to find some different ideas for inspiration.


I finally decided on a project that would spread over two medium sized canvases to create one large image. I love bird watching and parks so I decided that on the two canvases I would attempt to paint silhouettes of birds on branches. I also did not want a traditional white background so I used Mod Podge to create a funkier background with some pages from a book.


Here is a step by step for you! I'll start with a How-To on the funky canvas backgrounds for Part One and in a second post I will show the steps for the bird and branch silhouettes in Part Two.


SUPPLIES:  

  • 2 Plain Canvases
  • A Jar of Mod Podge (I chose Matte because I didn’t want my final project to be glossy but either would work!)
  • A book that you can cut up (I know, it made me uneasy too!)
  • An X-Acto Knife
  • A Rubber Roller
  • A Sponge Brush


DIRECTIONS:


1) Get a book to cut up. I went to Half Price Books (check out their website! you can find great coupons and great books for alot cheaper, just follow this link... Half Price Books). I found a neat one! It was an old 'Slang' dictionary and it had some really funny definitions in it. Now, cut out pages that you want to use along the inside spine of the book with the X-Acto Knife. These will become the background of your painting so try to pick ones full of text or with interesting information on them and make the cut as straight as possible.


2) Chose a layout for the pages, you want them to overlap and entirely cover the canvas. Lay it out first to decide what you feel looks best. *Make sure you wrap pages around each edges too so the sides of your canvases aren't blank.


3) Take your Mod Podge and the sponge and start to coat both sides of the pages and lay them on the canvas in the spot you designated. Mod Podge is basically glue so be careful! Once you place it, it isn't come up!


4) After placing each piece you are going to want to individually smooth them out. Sometimes, when laying a page, you will trap air bubbles that need to be released. After using the rubber roller (it is actually a Mod Podge product) and rolling it over each page, you shouldn't have a problem with the bubbles.


5) LET IT DRY! This may take awhile but you can't do anything until your piece is dry.


Once you're done your canvases should look similar to this...


Ta-da! Part one COMPLETE!


I was going to use a novel written in French for the background instead of the dictionary pages...What are your ideas?


Tuesday, February 14, 2012

Intent


Hello, I'm Jamie! Welcome to my web.log!

So, what is my purpose for this blog you ask? 
Well, here is some background on and the answer to that very question...

For the longest time I felt like there was nothing really special about me.  I didn’t have a cool hobby like dance or theater.  I wasn’t especially or naturally good at anything like singing or playing guitar.  I didn’t have that one thing that I could do all by myself that I was good at and that I loved even though it seemed like everyone else around me did.  

And then I found crafting.

I know that probably sounds cheesy or dramatic but I really mean it.  I finally found something of my own. Creating things comes naturally to me and I just recently discovered that.  I am good at it and I love it.  Its fun, I can get lost for hours making things or coming up with new ideas.  I am inspired all of the time by the things around me.  I see items at the store or in other blogs and think I could make that or I could use that for this project.  It is really exciting for me.

So, in this blog titled “CrEaTe: Projects by Jamie”, I am going to post How-To  directions, photos and feedback on things that I create and the products I use to create them with. 

Please, let me know what you think, share your ideas and give me suggestions. 

I am really looking forward to this and I hope you are too… here we go!