Showing posts with label decor. Show all posts

Friday, March 23, 2012

Chalkboard Plant Pots

I also love to bake, cook and garden as well as craft. It was actually a difficult decision choosing which subject to blog on, crafting obviously won! That being said, this next project does have some overlap from my other hobbies. I have a garden every summer where I grow green beans, carrots, cucumbers, gourds (for bird houses), cat nip and various other things.  I hate only having them in the summer though so I decided I would plant some fresh herbs in the winter indoors and that way I would be able to have at least fresh parsley, mint, basil and oregano when i make sauces or bruschetta or other things that require these herbs.  Then of course I decided to get crafty with it haha.  Here is my how-to.. 


SUPPLIES:

  • 4 Ceramic Terracotta Pots (with matching water catching dishes)
  • Painters Tape
  • Chalkboard Paint
  • Chalk
  • Seeds ( I chose mint, parsley, oregano and basil)
  • Dirt
  • Water
DIRECTIONS:

1) Tape off the top thick rim of the ceramic pot with the painters tape.  I did this because I did not want the entire pot to be chalkboard. I liked the contrast of the terracotta color with the black of the chalkboard paint.  

2) Once it is taped off then you can begin spraying with the chalkboard spray paint.  I did multiple thin coats because I have found that works best.


3) Let it dry and remove the tape.. 

4) Write the names of the seeds you are going to plant on each pot with the chalk.  Just make sure the name you write correlates with the seed you plant! All of the seeds look so similar and the plants when they grow are hard to tell apart sometimes also so be careful! 

5) Plant your seeds! I put the dirt in, wet it and add the seed on time.  Then I lightly brush some dirt over them.  

6) Now place them in front of a window that receives a lot of sunlight and wait for them to grow!

You're done! Here is how mine turned out! 
Now I have fresh herbs all of the time! 
It's great!


What seeds would you plant?!

Friday, March 16, 2012

Colorful Doormat Part 1

This project is by far one of my favorites.  I have been attempting to redo my house in a way to make it less 'store bought' and more homemade. I decided the easiest way to do this would be room by room so I decided to start with the porch/entrance.  That is where the whole doormat idea came in.  I wanted my guests to be greeted with something cute, colorful and original.  So, here is my How-To for my summery cute doormat- Part 1!

SUPPLIES:
  • 14 pieces of wood cut 1"x2"x14"
  • A Drill
  • Primer/Sealer
  • Sand Paper 
  • A Paint Marker

*A side note- OK so you need 14 pieces of wood that are 14 inches long, 1 inch tall and 2 inches wide.  How do you get that? Well, I went to Home Depot (Home Depot!) and I purchased three 8 foot long pieces of wood that were 1 inch tall by 2 inches wide (they were like .75 cents each.)  Then I asked the nice man working (who actually wasn't that nice) to cut them into 14 inch pieces for me.  They do it for free, you just buy the wood and tell them how you want it cut.  Then you walk around a bit and check back periodically until your pieces are cut! When I came back I actually had 18 pieces because you could get six 14 inch pieces per board.  I didn't want a super long doormat though so I only used 14, spares are always great though for mistake purposes!

DIRECTIONS:
1) Ok, on to step one! Now, you have 14 1x2x14 inch pieces of wood you are going to want to drill two holes in each one through the 2 inch width of the board.  I chose to do it 2 inches from each end.  I took a paint marker and on the "sides" of each piece I made 2 marks two inches from the end. Be careful when you drill because sometimes a large drill will split the wood and make it unusable.  I actually drilled a small hole in the correct location and then drilled the larger hole so there was less stress on the wood. 

*You must make sure that holes are across from each other and will meet up in the middle when you drill through.  This requires you to drill STRAIGHT through from one side to the other.  Here is an image to help explain better... Basically, do this to each side...


2) Ok so hopefully you've now drilled two holes straight through each board two inches from the end and through the width.  Now you are going to need to sand the wood until it's smooth.  When you drill it sometimes splits the wood weird so you are going to need to do some serious sanding in some areas.

3) Lay your boards out and spray paint them with your primer/sealer.  I used an 'all in one' because I am slightly impatient and thought it would be easier and more efficient to knock them both out at once but you can do it separately if you'd like!


Let it dry! Part one COMPLETE!


Did you use different dimensions or amount of boards for your doormat?

Wednesday, March 14, 2012

Traveling Hearts Wall Art

Brian and I love to travel.  We have been together for almost three years now and in that time we have already traveled to Buffalo NY, New York NY, Portland ME, Nantucket MA, Boston MA, Hampton Beach NH, Cape Cod MA, Atlantic City NJ, Nashville TN, Chicago IL, New Orleans LA, Fairhope AL, Columbus OH, Pittsburgh PA, Provincetown MA, Newport RI and more together.  Because of our love of travel and our great memories of the places we've visited I wanted to make something to remind us every day of those trips.   I saw something that inspired this project on Pinterest or StumbleUpon, I can't remember which, and decide it was perfect. Here is the how-to for my Traveling Hearts Wall Art... hope you like it!


SUPPLIES:


  • Decorative Picture Frame
  • An Atlas or Maps (of the places you'd like to include)
  • A Heart Stencil
  • Pencil
  • Scissors
  • Glue
  • Ruler
  • Scrapbook Paper


DIRECTIONS:


1) Take the map of your choice and your heart stencil and trace the heart around the area of the city or place you'd like on your wall art.  For example, place the heart over the map of a section of Cleveland and trace it.  I chose six different locations but you can do it as many times as places you'd like to be framed. I placed mine in the order of a six pack of soda because I liked the space between and a more organized, less cluttered  layout but you can get creative with your placement also.


2) Cut out the map hearts.


3) Paste the mapped hearts to the scrapbook paper in the location you want them. Again, mine is two across and three down like a six pack but whatever way you choose will work.  Also, make sure you have measured the scrapbook paper to fit the back of the frame, I usually take the image that the frame comes with, cut it out and trace it onto my scrapbook sheet.  Then I cut out the scrapbook sheet and it's always a perfect fit.  


4) Put your paper with the hearts glued on it in the frame, hang and you're done.


Here is ours... 

We chose:

Chicago           Portland ME        

           Fairhope AL         Boston 
                
New Orleans  &   Pittsburgh


What places would you choose? Maybe a timeline of your life? First date to proposal to wedding and so on? Could be neat!

Thursday, March 8, 2012

Mosaic Tray

For Christmas this year my little sister bought me a complete mosaic making kit.  She knows I love to craft and that I hadn't tried mosaic before so she thought it would be prefect.  Well, it was!  The set came with small glass tiles, 'nippers' (which is the tool you use to crack the tiles into different shapes), glue, grout and a few various other things for the project. I recently got around to making a mosaic and I wanted to post about it.  When she gave me the set she gave me a terracotta pot to create a mosaic on but after browsing Pinterest- Best site EVER for ideas on cooking/crafting/wasting time... I decided I wanted to do a mosaic serving tray. I bought the tray at Old Time Pottery Barn and then I went to Michael's, bought some iridescent tiles to add and then I sat down to create! Here is the how-to and how it turned out.  I LOVE IT! <-I feel like I always say that haha but it's true!


SUPPLIES:


  • A Tray
  • Tiles
  • A Nipper (and a plastic Ziploc bag)
  • Glue (and a Popsicle stick) 
  • A Marker
  • Grout 
  • A Sponge
  • A Trowel of some sort


DIRECTIONS:

1) Take your tray and your maker and outline a pattern you'd like to mosaic.  I chose something simple that I thought would look nice, it is a few swirls of solid colors with the rest of the background filled in with iridescent blue tiles. 

2) Take your nipper (Click here to learn about Nippers!) and cut the tiles into the shapes you'd like to use.  You can use the squares 'as is' but I liked the look of the cut glass so even though it was more time consuming I chose to cut each tile.  I would recommend cutting them inside of a bag.  I would place the tile in the grip of the nipper and then stick the entire front end and my hand into a large Ziploc bag.  When the tiles shatter they tend to fly everywhere, I had tiny glass slivers all over my couch and floor until Brian suggested this method. MUCH smarter/less messy!

3)Next, glue each piece of tile onto the tray.  You are going to want to make sure the pieces are close together, almost like a puzzle. Here is what it should look similar to so far...


4) After the glue dries you then need to grout the entire tray.  The grout is powdered cement that you mix with water. Start with a teaspoon of water at a time, you want the grout to be of a similar consistency to toothpaste, not too much runnier.  You are going to spread the grout over the tiles evenly and make sure it gets between the cracks of the tiles or those spaces in between.  Here is what it will look like grouted...


5) Let the grout dry for about fifteen minutes, then take a damp sponge (not wet!) and clean off the top layer of grout.  The tiles will become clear an shine/sparkle.  I did it a few times because I wanted the tiles to be as least hazy as possible.  Once you've cleaned it off to your liking let the grout dry completely and you're done!

Here is how mine turned out!


What color scheme did/would you choose? Did you make a tray also or are you going to make something else? 

I really like the way the iridescent colors turned out, it's looks great in natural light.  Maybe I'll try to get another photo in natural light soon!


Wednesday, March 7, 2012

Colorful Plant Stands

We have acquired quite a few plants at our house and thankfully we have a large east facing window in the front of our house so all of those plants can get ample sunlight.  This does however require a large amount of plant stands all along the window and since we have acquired them over time they didn't match. Well, after looking at them daily I thought of a new idea! I was going to 'repurpose' them! Here is the how-to...

SUPPLIES:
  • Plant Stands
  • A Tarp
  • Spray Paint
DIRECTIONS:

1) Lay the tarp out in a well ventilated area... I painted the first two in my craft room, with the window open, but it still didn't help.  The entire upstairs smelled like spray paint... oops..  Anyway, then I asked Brian to move the cars from the garage and set the tarp up in there. MUCH better.

2) Mist each stand with a different color of spray paint, do lots of thin layers about ten to fifteen minutes apart.


3) Let the paint dry for over an hour and then you're done! Here is my before and after...


 The colors I chose were... 


Watermelon, 


                  Sea foam Green, 


         Mustard Yellow


         Bright Red, 
               
                                   Mandarin Orange,  


                  and Sea Blue


MUCH better! I really like color, it cheers me up so I love the new addition.  

What are your ideas? Polka Dots? Stripes?

Friday, March 2, 2012

Give a New Look to a Bookshelf

This project just kind of fell into my lap and turned into something really great that was totally not what I had originally planned.


Here is the story...


My boyfriend and I went to Target to look for a plant stand for a Meyer Lemon tree we had purchased. We wanted to put the stand in in the front picture window of our home so our lemon tree could get enough light. Well, while looking through the aisles of Target I found this bookshelf for only $15. I thought it was a GREAT deal so I decided we would be leaving the store with it also!


We got home and put it together in our living room, it's not real wood it's like compacted cork but it looked nice! So we put it together and then he asked me what I planned on doing with it. Well, my original idea was to put the bookshelf in my craft room to help organize all of my supplies but he had a different idea. He suggested since the shelf looked so nice, we should put in in our hallway as a decoration.


We put the bookshelf in the hallway and it looked really nice so we agreed to keep it there. BUT being that I am obsessed with crafting I wanted to make the shelf a little bit more me and less plain. This is where the crafting comes in, it was so simple too! I decided to take some Martha Stewart paint testers I had purchased at Home Depot a few weeks earlier and paint the inside bottom panel of each shelf a different color. It was simple, easy and fun and it added that something extra I needed to make the shelf 'mine'.


Here is the How-To...


SUPPLIES:

  • A Bookshelf
  • 3 Different Colors of Paint
  • Painters Tape
  • A Paintbrush

DIRECTIONS:

1) Take your bookshelf and the painters tape and tape off the sections you do not want painted. I did the a strip on the right and left inside sides of each shelf and the back panel because I was painting the bottom panel. I also taped of the front lip of each shelf.

2) Paint! I did a few coats because I wanted the colors to be bright.

3) Let it dry and remove the tape. You're done!

here is what mine looks like!...

What do you think? Are you refinishing any furniture?

Thursday, March 1, 2012

My Craft Room

I have an entire room in my home dedicated to my crafting obsession.  

It used to be our 'den' or computer room. But, we both have laptops and rarely use the desktop so when my boyfriend converted our basement into a recording studio for his hobby I decided I would take the den for my hobby and make it my craft room.  It's pretty cool.  I try to keep the place organized and I make sure I have TONS of lighting in there.  

Here is an image of the main table that I do most of my work at.  I also have a closet in there which has items in it and some storage drawers that are full of fun things to use in my projects. I just wanted to let you see where I do my work in case anyone was curious! 


It has pretty much everything I need.  Ideally I would like it to look like this...(Minus the carpet) But I think we're a ways away from that. We'll see though!! 


Do you have a craft area? Any tips for mine? Or what about any MUST HAVE items I should get for my craft room?!

Sunday, February 26, 2012

'Create' Wall Art

Once I put the melted crayon art on my wall I realized how empty the wall of my craft room were. So I decided to make something else for the wall above my craft table. I wanted it to relate to crafting and to motivate me or remind me why I have that room in the first place. After thinking about it i came to the conclusion and this piece of wall art should just say CREATE. It is after all the name of my blog, what I love to do and it defines the purpose of that room!

Here is my how to for my 'Create' wall art piece...

SUPPLIES:
  • 5 Different Colors of Acrylic Paint
  • 5 Correlating Colors of String/Yarn
  • Glue
  • Cardboard
  • Scissors
  • Scrapbook Paper
  • A Picture Frame
  • A Paint Brush
  • A Pencil
DIRECTIONS:

1) Take the piece of cardboard and the pencil, draw bubble letters in the font that you would like your word to be in. I wrote Create and did it in curly-ish font.

2) Cut the letters out!

3) Paint each letter in a different color with your acrylic paint. Let them dry. (Here is a link about acrylic paint, it's so versatile and one of my favorite things to work with... About Acrylic Paints)

4) When your letters are dry wrap them in the yarn/string in a scattered spaced out way. Similar to how you wrap your headphones around your iPod.

5) Fit the scrapbook paper to the frame and frame it. I removed the glass pane from the frame because I wanted 3D letters.

6) Glue the letters to the frames piece of scrapbook paper.

YOU'RE DONE!

here is mine...


What do you think? What word would/will you do?!

Wednesday, February 22, 2012

Melted Crayon Art

I am addicted to StumbleUpon and Pinterest and if you are as well you will understand why I had to make this next project.  It's EVERYWHERE! I kept seeing so many different versions of this project on different sites I just had to make one.  Here is the How-To...  I may be adding to it later in a Part Two post if I get motivated. I have another idea!...


SUPPLIES:

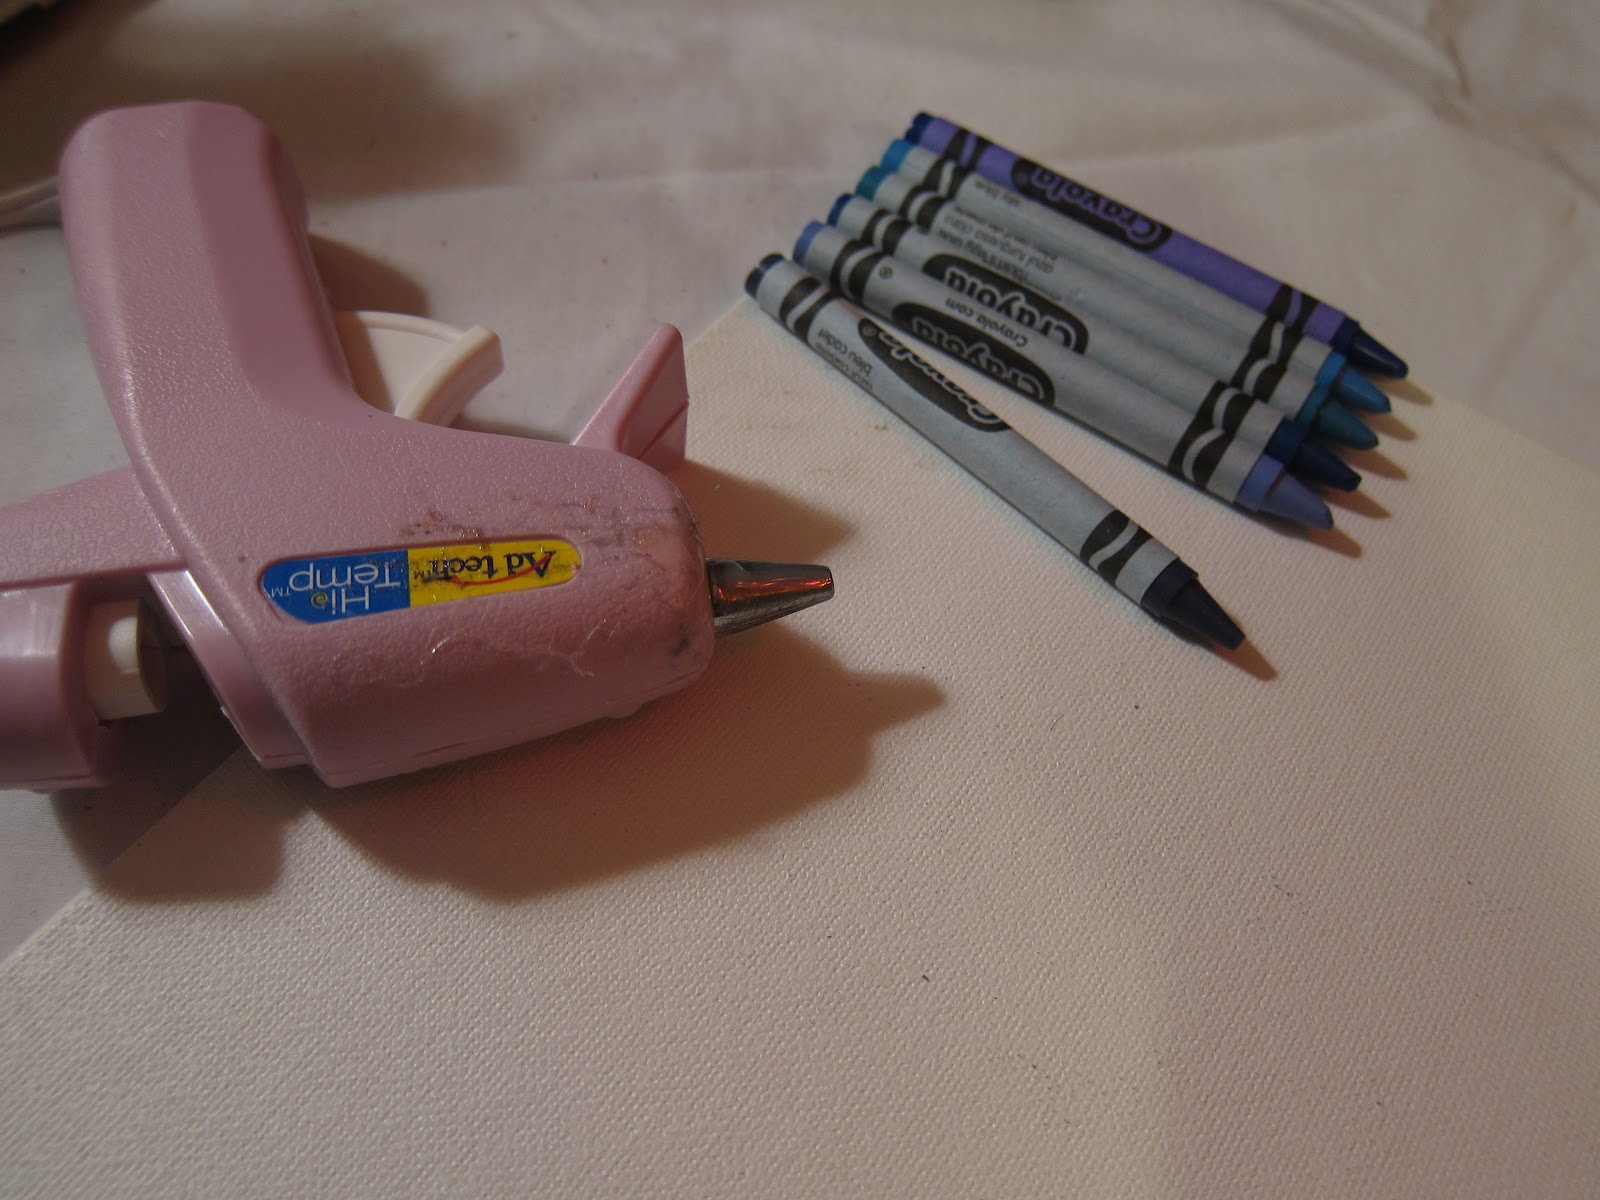
  • A Box of Crayons
  • A Hair Dryer
  • A Canvas
  • A Hot Glue Gun
  • Glue Sticks
  • A Ruler


DIRECTIONS:

1) Choose the colors you would like to use for the project and arrange them as you would like.  I chose a standard rainbow arrangement because I think its pretty. 

2) Take the crayons you chose and arrange them along the top of your canvas in the pattern or order you would like.  Like this... (I used a ruler to make sure they were straight.)

3) Now glue each individual crayon down onto the canvas with your glue gun.

4) This is the fun part! Plug in your hair dryer (I would not recommend using the one you use daily unless you don't mind cleaning it off after the project, the melted crayons splatter!) Ok, hold the hair dryer about an inch from the top left end of the crayon in the corner.  You have to hold it here for awhile until the crayon starts to melt and run, then you can use your hair dryer to push the melted wax wherever you'd like it to be on the canvas.  You can melt all of them as much or as little as you like,  I melted mine alot because it was so fun! 

5) Let it dry, you're done!

Here are some other ideas from Crayola for melted crayon projects!...


Oh, and here is how mine turned out...


I really like it! It's colorful and fun and I have it hanging in my craft room :)

Are you going to make one? What color scheme are you going to use? You could even put it upside down! What do you think?


Tuesday, February 21, 2012

Bathroom Wall Art

Our bathroom was kinda bland and I wanted to do something fun and different with our wall decor. Most people have photos of toothbrushes or soap or like butterflies for some reason but I wanted something unusual. And I didn't want to spend a lot of money.


I came up with this idea because I saw a photo of someone who had framed a bunch of Hermes and CHANEL bags over a vanity. I loved it but I didn't have those types of high fashion bags from purchases just laying around. I had one Coach bag (from my wristlet) and one CHANEL bag (from my sunglasses) which clearly wouldn't have been enough... then I thought well.. I receive ELLE Magazine and that is full of high fashion!


I started going though the magazine and finding AWESOME ads that were glamorous and beautiful. They were ads that I knew if I had gorgeous supermodels in my bathroom I would be more motivated to be a little more glamorous every day. So here is where the project began...


SUPPLIES:

  • Magazines (I chose ELLE)
  • Scissors or X-Acto Knife
  • Picture Frames
  • White Paint
  • Picture Hangers
  • A Hammer
  • Nails
  • Ruler


DIRECTIONS:


1) Take the magazine and find the images you want to frame. You are going to have to compare them to the size of your frame. I chose four 8x10s, two 4x6s and one 3x5 of all different designs and colors. I bought them as Marc's and Walmart for around $2-$5 each. Once I had a stack of images that fit and I liked I cut them out with my X-Acto knife and set them aside.


2) This set was necessary because I had purchased frames that were not all the same color SO I had to lay each one out and paint them white. I chose Krylon Dual with paint and primer to knock two steps out at once. I spray painted each frame so they matched... See Below


3) Then I took my picture hangers, measured the center of the back of the frames and hammered them in.

4) Next add the ads that you want! I chose 6 different ones - A Gucci, a Marc Jacobs, a Valentino, a Dolce & Gabbana, a Bottega Veneta and a CHANEL. I also frames the Coach bag I had for the small wall next to the sink.

5) Now arrange them and hammer the nails in the wall in the spot you desire to hang them from!

Here is how mine turned out!


I LOVE THEM!!! And I get A LOT of compliments! Fun, easy and cheap! My boyfriend doesn't mind either because they're hot supermodels, Haha!

What would you frame? Supermodels? Cars? Art?